Thursday, November 25, 2010

Book Love


Lately I've been having some health problems. Nothing major but bad enough to stop me from doing any blog post worthy cooking. I did however take the time to look around and see what's new in the delicious world of cookbooks. Here are some favourites that I'd like, correction, I need to pile on my bedside table asap:


Picture 14
Tartine Bread by Chad Robertson, baker and co-owner of Tartine bakery in San Francisco. I absolutely love this book. A handsome surfer who makes chewy, crusty, perfect bread. What's not to love? Watch their video and prepare to fall in love. Over and over and over again...
Picture 13
Bourke Street Bakery, baked goods,all the way from Sydney, Australia. If you need convincing, just take a look at their website.
I can't wait to get this one for those lazy, winter Sunday mornings.
Picture 15
French Feasts, 299 Traditional Recipes for Family Meals and Gatherings, by Stephane Reynaud. Hmmm...I'm thinking apres-ski gatherings...
 
Picture 17
Recipes from an Italian Summer. For the summer of your dreams, spent cooking for your friends in your (rented) Sicilian villa, or on the shores of Capri. Or your downtown apartment in Toronto. Either way, it's going to be one perfect summer.


Monday, November 1, 2010

Vanilla apple tart


IMG_9055


What a crazy day we had yesterday! Snow in the morning, sun in the afternoon... Autumn and winter at their best, all in one day! The streets were crawling with hungry little trick or treaters, decked out in their Halloween costumes. This apple tart in by no means an antidote for their inevitable sugar rush, but it was the perfect Halloween desert for me. Lately I've been playing around with different types of fillings for sweet tarts and while I love almonds, frangipan filling (at leat the ones I've tried so far) somehow always turns out a bit on the dry side. With this apple tart I wanted something creamy, smooth, with a dash of sourness. The simple combination of full fat sour cream, eggs, sugar and vanilla really fits the bill here. Next time though I will double the amount of filling, maybe add some cardamom or lime oil and use black plums or pears. Oh, the possibilities!

Ingredients:

For the tart shell:

120 gr all purpose flour
120 gr softened butter
120 gr creamy cottage cheese
pich of salt

For the filling:

2 whole eggs
50 gr powedered sugar
200 ml full fat sour cream
1 tsp vanilla essence

4 medium apples, peeled and cut into small wedges
juice of half a lemon
2 tbsp thin apricot jam
1 tbsp pine nuts

Preheat oven to 400F. Lightly butter a 10 inch tart pan.
Mix together all tart shell ingredients until smooth. Do not overwork the dough. Refrigerate for 30 minutes.
For the filling, mix eggs, sugar and vanilla until well blended and creamy. Add sour cream. Mix well.
Mix apples with lemon juice.
Roll out dough to fit tart pan. Pour in sour cream mixture and place apples over top.
Bake for about 30 minutes. Remove from the oven and brush with apricot jam. Sprinkle with pine nuts and bake for 20 more minutes or until golden. Please check frequently, oven temperatures may vary.

Tuesday, September 28, 2010

Lemon-yogurt fritters


IMG_8295
I'm back after one of the busiest yet best summers on record. There was not much time to post anything.  This summer for us was the summer of tomatoes. Big, juicy, colourful, wonderful tomatoes. Served as bruschetta topping, sandwich filler, sliced with fresh basil, sea salt, olive oil and balsamic, or my favourite the once-a-week fresh tomato sauce. We had many lovely dinners of bucatini with crab and tomato sauce, penne rigate with pancetta and vodka-tomato sauce and so on. Tomatoes for breakfast, lunch and dinner. I have a very eclectic range, don't I? But now it's time to bid adieu not only to this magnificent fruit but also to my lovely, minuscule garden, source of many a culinary pleasures over the summer.
Now it's time for fragrant curries and warm soups. Slow simmered stews, hot drinks and loads of apple ice cream.
And just because I have a thing for deep fried dough, I'm going to start with these lemon yogurt fritters I found on a wonderful blog, Orangette. See the recipe here. I haven't changed a thing. It's perfect as it is. Read it and weep. Or better yet, make them. As in now!
This is it, proper soul food for the beginning of something new. Because summer is over. Crying, I am.

Friday, August 13, 2010

Honey-baked nectarines with labne

IMG_8567

Here's the thing: I am very hungry, very busy and very excited in no particular order. So here's a quick recipe for your Sunday morning. Or any morning of the week. I've had baked fruit before, but this one towers above all others. I'm planning on devouring every delicious, silky spoon of it every single weekend till the cows come home, or until nectarine season draws to an end. Whichever comes first.

Honey-baked nectarines with labne

Ingredients:

25 gr unsalted butter, coarsely chopped
6 nectarines, pitted, halved
100 gr honey
a few bruised cardamom pods
1 vanilla bean, split and seeds scraped
juice of 1 orange
500 gr Greek yogurt for labne

Drain the yogurt over a muslin lined sieve over night. Next morning you can call it labne.
Preheat oven to 375F. Scatter butter pieces in a baking dish. Place all nectarines, cut side up over the butter. Scatter all spices on top of the nectarines, drizzle with honey and pour over orange juice. Bake for about 20 minutes or until your kitchen smells so good, you just can't take it any more. Serve warm with a generous dollop of labne. Add some home made granola and you can call it a meal.
Recipe from GT magazine.

Tuesday, July 27, 2010

Beat the heat

IMG_8272

Here's a little something for the hottest of summer days( two little somethings actually), for all you gourmands out there.
Some of us won't refrain from preparing and enjoying some quality chow just because it's hot outside. And some of us will. If you're part of the latter group, see you in the fall! If you're still here, you must try this refreshing mango and cucumber soup. I've already made it at least five times this summer. Yes, it's that good. There's a bit of prep work involved, but all in all it's easy, fast and there's no cooking involved.
Summer meal planning is easy, really. Especially if you stick to the basics. Cold soups, grilled meat or seafood with nothing but salt, pepper, garlic and lemon juice, throw in some fresh veggies with a cool yogurt sauce and you're home free! As for the sweet part, you have fresh fruit, ice cream or sorbet. My freezer is laden with mango, red currant and raspberry sorbet throughout the season. Now, if you want to take it a step further make a nice tart crust, fill it with whipped cream, mascarpone, ricotta or some pastry cream and top it off with fresh fruit of your choice. And you're done!
Making the perfect tart crust has been somewhat of an obsession of mine lately. If you share my obsession, search no more.
I think I found the one, courtesy of Fran Bigelow, author of Pure Chocolate. This tart crust has a crumbly dough that won't shrink or puff when baked, eliminating the need for the pie weights. Low gluten cake flour makes the dough short and crisp. Not to mention that it's nice and thin and not at all mealy, which most tart shells tend to be.
The key to making perfectly tender tart shells in temperature. Make sure to thoroughly refrigerate your oeuvre. The dough needs to be chilled when it hits the oven. The heat makes the butter expand, forming air bubbles that create a light pastry.

Chilled mango and cucumber soup

Ingredients:

4 ripe mangoes
2 English cucumbers, peeled and deseeded
2 tbsp finely chopped red onions
fresh lime juice to taste
2 tbsp chopped coriander
2 tbsp chopped mint
salt and pepper to taste

Finely chop 2 mangoes and 1 cucumber. Set aside. Coarsely chop remaining mangoes and cucumber. Add to a food processor along with the rest of your ingredients. Blend until almost smooth. Add 1 cup pf water. Blend again.
Transfer mixture to a large bowl, add the finely chopped mango and cucumber. Stir well and chill for a few hors before serving. If you desire a thinner soup, add more water. For a creamier texture, take 1 cup of your finished soup and puree it with an immersion blender. Pour it back into the soup and stir well.
Try adding chopped chillies or fresh ginger for some kick.
Recipe adapted form Gourmet magazine.

The best sugar tart crust (so far)

Ingredients:

3/4 stick (6 tbsp) unsalted butter at room temperature
1/4 cup sugar
1 large egg yolk
1 cup cake flour
all purpose flour for dusting

Cream together butter and sugar with a mixer until light and fluffy. Add egg yolk. Continue mixing until completely smooth. Add cake flour and mix until just blended. Transfer to a sheet of plastic wrap and chill for at least 2 hours or overnight.
Lightly butter a 9 inch round tart pan (this is very important). Remove the chilled dough from the refrigerator and let it warm on the counter for about 20 minutes until pliable but still cool to the touch. On a floured board knead the dough a few times. Pat into a ball and flatten with your hands to a 5 inch round disc. Begin rolling from the center out until an 11 and 1/2 inch circle, about 1/8 inch thick is formed. It the dough gets difficult to work with, just return it to the refrigerator for a few minutes. Gently place the dough to the buttered pan. Press it onto the bottom and around the edges of the pan, keeping the sides even and thick.Trim excess dough along the edges. Pierce the bottom with a fork and place in the refrigerator until well chilled, about 30 minutes.
Preheat the oven to 350F. Place the chilled tart shell on a baking sheet. Bake for about 20 to 25 minutes or until golden.
Recipe adapted from Pure Chocholate, by Fran Bigelow.


IMG_8329

Sunday, July 11, 2010

Tuesday, July 6, 2010

Mon cherry amour

IMG_8054


Cherry season is upon us and while I'm sure most of you would rather eat them as they are, crisp, juicy and straight from a bowl (or from a tree if you're lucky), I urge you to try this recipe. Even if it's 40C outside and the last thing on your mind is baking. It honestly takes no time at all to make. You just do some mixing, pouring, scattering and finally devouring copious amounts of these "black beauties".
A few weeks ago I was introduced to what I think was a new kind of cherry (investigation in process), somewhere between a black cherry and a sour cherry, deep red, a tad softer than your regular cherry and with some much needed sourness thrown into the mix. Upon returning from the market the two of us finished off almost the entire contents of a 7 litre basket in one sitting. When I returned next week for seconds and possibly thirds, the cherries in question where nowhere to be found. So I settled for these black cherries, which are almost as delicious but a lot easier to sacrifice for treats such as these cake squares, maybe pickled cherries or even some luscious, silky jam.
This is the stuff summer dreams are made of, along with lemony ice tea, a cozy porch and this song.

Black cherry cake squares

Ingredients:

3 whole eggs
350 ml full fat yogurt
250 ml sugar
100 ml vegetable oil
1 tbsp baking flower
1 tbsp vanilla extract
500 ml all purpose flour
500 g pitted black cherries

Preheat oven to 375C.
In a bowl mix well eggs, sugar and yogurt. Add oil, baking powder, vanilla and mix well. Finally add flour and mix until just combined. Spread batter in a 9"X13" metal baking pan, lined with baking paper. Scatter cherries over the batter and bake for 40 to 45 minutes. Dust with powdered sugar, cut into large slices and serve while still warm. Or not. Either way, you'll be happy. I promise.

Tuesday, June 8, 2010

Easy Peasy

IMG_7842


I heart peas! Always have, always will. I bought a basketful of them the other day. Fresh and sweet. And never enough.
When it comes to peas creativity fails me. Every time. There's only three dishes I've ever made with fresh peas. And that's just fine by me. I make chilled pea and mint soup, a pea, pancetta and pecorino crostini topper and this little recipe right here. Creature of habit that I am, I'll probably stick to them.
Because there's not a lot of cooking involved, the quality and freshness of your ingredients is of the utmost importance here.
Fresh, organic (if possible) peas and mint and the best quality feta you can find. I've been buying my feta cheese from the same place for years. From a sweet old lady at the farmer's market. She's small, shy and as cute as they come. She also sells the best filo pastry outside of Greece, Kalamata olives and fresh mint. (Spanakopita? Good thinking!) Oh, and she also just passed her driving exam. Again. Annoying, (as she put it), but once you turn 80 they make you to do these crazy things from time to time. Such is life! Her words, not mine.

Green peas with feta, yogurt and mint

Ingredients:

2 lb fresh peas in the pod, shelled
1/2 lb best quality feta cheese
1/4 lb Greek yogurt
1/4 lb creme fraiche
1 bunch of scallions, finely sliced
handful of mint, shredded
2 tbsp olive oil
juice and zest of 1 lemon

Cook peas in boiling water just until al dente. Drain well. Mix with olive oil, scallions and mint.
In a separate bowl mix yogurt, lemon zest, creme fraiche and feta. Add to pea mixture. Season to taste with sea salt, pepper and lemon juice. Serve with warm pita bread. You can also sprinkle some sumac on top for good measure.
Ultra delish both warm and cold.

Monday, May 24, 2010

A lovely day

IMG_7787


I woke up smiling this morning. It was rather early, the sun was up, birds were singing and I was surrounded by this mesmerizing lush green as far as the eye could see. Early summer bliss in the middle of the city. Very very quiet. For you see, it's a holiday today. The first long weekend of the season. And city folk are rejoicing, you might say. Some went to cottage country, some went camping while others chose to stay put and enjoy the peaceful pace of the first holiday Monday. I belong to the latter category. Just lying here on a checkered blanket, reading a very old edition of The Dickens Digest, "four great Dickens masterpieces written for the modern reader" it says. I bought it at a yard sale not long ago. As I open the book I find an inscription written on the very first page: "From Frank Whitmore, Christmas 1943." It was someone's Christmas present during the Second World War. That makes it all the more special to me. I am going to escape today. To another world. Then maybe take a nap al fresco. My favourite. Don't even have plans for cooking. Some cool garden pea salad with feta and yogurt will do. And maybe some minty lemonade to wash it down.
Breakfast was simple and comforting as well. Some rather robust stalks of rhubarb have crossed my way the other day. So I made some stewed rhubarb and strawberry jam to go with my semolina porridge for breakfast. Utterly delicious, if I do say so myself.

Semolina porridge with strawberry rhubarb jam

Ingredients:

2 1/2 cups milk
1 tsp vanilla extract
grated zest of 1 lemon
1/4 cup of honey
60 g semolina
20 g butter
slivered pistachios to serve

For stewed rhubarb preheat oven to 325 F. Add about 400 g rhubarb (cleaned and cut into 2 cm pieces), 3/4 cup of brown sugar and 2 cinnamon quills to a baking dish. Mix it all together, cover the dish with foil and bake for about 1 hour. Remove dish from the oven. Let it cool a little. Transfer stewed rhubarb to a pan. Discard cinnamon quills. Add 2 cups of strawberries and sugar to taste. Quickly boil for a few minutes, until strawberries have broken up and given the jam a wonderful rich pink colour. Cool.

Combine milk, vanilla, lemon zest, honey in a bowl. Bring mixture to a boil. Add semolina in a steady stream and cook until thick, about 10 minutes. Add the butter and stir until melted. Transfer porridge to 4 individual bowls ans serve with strawberry rhubarb jam and pistachios scattered on top.

Sunday, May 16, 2010

Monday, May 10, 2010

Playin' around

IMG_7537

Yeast and I have had somewhat of a roller coaster relationship throughout the years. As a rebellious cook/teenager, I avoided any recipe that even mentioned the dreaded Y word. Same goes for gelatin.
Needless to say my first endeavour into this (for me) uncharted territory was a disaster of epic proportions. What can I say? I was 15, it was Saturday, and I felt adventurous. Enter an old recipe for cheese danish with raisins. I had fresh yeast on hand, lots of it. So I though, why not?
Thick headed that I am, I was adamant about not needing any help whatsoever. Baaad idea. On the first try the yeast wouldn't rise. No problem, had lots more where it came from. Second try, just as bad. I had the windows open, there was a major drought in the house. But the recipe didn't mention anything about the precarious working relationship of yeast and drought. Thus, not my fault! Finally, on the third try, yeast + sugar + warm water rose beautifully. I was in business! Or so I thought. I put all the ingredients in my large ceramic bowl, mixed it all together, worked the lovely vanilla scented dough into a shiny, springy little ball of beauty. I felt really proud. I covered the dough and let it rise while practicing my "see, I told you I could do this by myself" speech. And then I waited. And waited. And waited some more. But even after two hours the dough wouldn't rise. After three hours and much consideration I concluded that it 
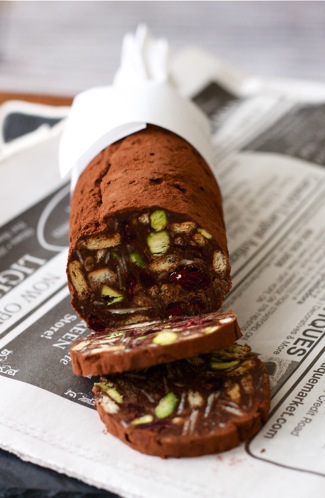
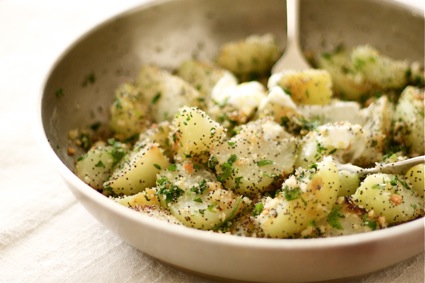
has risen. A little. A tiny bit. And it still smelled wonderful. Plus I already made the filling. The creamiest cottage cheese from my grandmother' own cremerie, kirsh soaked plump raisins and vanilla sugar. So I rolled out the dough, cut it in squares, filled it with big spoonfuls of cheese and formed the adorable tiny purses. They were a marvel to look at. At this point I was convinced that this achievement was going to be the pinnacle of my blossoming culinary career. To backtrack, I had had some considerable cooking success before that day. My chocolate sour cream ice cream and my potato salads were famous. I mean, really. With my entire family, all three of them.
Next I placed my baking sheet of danishes in the oven and anxiously waited for the final result. I had my serving trays all prepared with doilies and all. The whole house smelled wonderful.
After 30 minutes, the recommended baking time, I went to check on my work. I wish I hadn't. The dough had not risen at all and all the cheese filling was seeping out of the little pockets, forming charred crusty little pools on both the baking sheet and the oven floor.
It took me five years to even look at a recipe with yeast again.
Since that time many a yeasty recipes have found their way to my kitchen, with various degrees of success. I got bolder and no yeasty recipe is ever going to scare me again! But seriously, no two recipes ever come out exactly the same. Is it just me? Am I doing something wrong?
I'm on a quest to make the perfect brioche. Fluffy, light, not to buttery or crumbly or dry and definitely not one that requires 7 eggs for 2 cups of flour!
I know a lot depends on the quality of your flour, your eggs and even the room temperature. I've done my research and the consensus seems to be that fresh yeast is superior to that of the dried kind. But these days fresh yeast is not widely available.
And it's a little scary, too. And then there's the instant kind, which I never used nor do I have any desire to use in the future.
If you get the best results by letting your dough rise slowly, what exactly is the point of instant yeast? What's the hurry?


IMG_7567


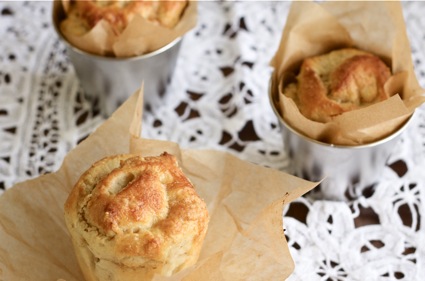
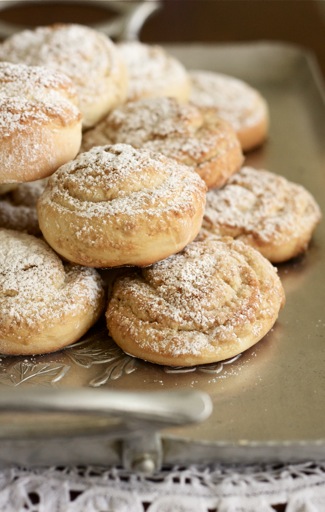
This past weekend I was craving the satisfaction that comes from working with soft yeasty dough with your bear hands. So I made these walnut buns, using Nigella Lawson's Norwegian Cinnamon buns recipe for the dough. I halved the recipe, since
using 4 cups of flour for two people seemed a tad to much. For the filling I used 1 stick of butter mixed with 1 cup of ground walnuts and some vanilla sugar. Should you wish to give this walnut version a try, you could also use this recipe (for the dough), one of my favourites and on regular rotation in our kitchen. The walnut cream knocks it out of the ball park, so you might want to try it. You can bake them in muffin tins, or just spread the filling on the dough, roll up, cut it up in 1 1/2" coins and bake them as you would cookies, placing them 2 inches apart on your cookie sheet. I baked the second half in these cute little tins I bought in Tokyo, along with a bunch of other tins and moulds that I have yet to figure out how to use.
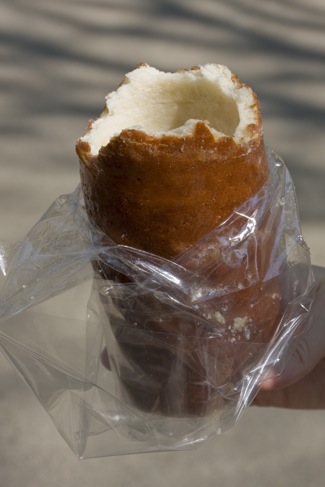
Happy baking! As for me I'm right back to the drawing board. I still have a lot to learn. Another day, another stubborn recipe: caramel roll ups with fennel seeds. And yeast, of course. I'll keep you posted. Later,(in my life) I might even consider making homemade bread. Real bread. With crunchy, thick crust. Just like the ones they make in Paris. Whit natural starter or old dough. Check out the brilliance here.
In the meantime any yeast related tips, suggestions are more then welcome.

Sunday, April 25, 2010

Happy Sunday!

"There's no sincerer love than the love of food."-George Bernard Shaw

IMG_7487


IMG_7500


IMG_7515

Tuesday, April 20, 2010

Something for sakura season

IMG_7412


Here's something quick and oh so very Japanese to celebrate cherry blossom season. It may not be the real thing but it sure brings back wonderful memories of Japan. Kyoto, to be more exact, with its majestic temples and cozy restaurants, where I was slurping humongous bowls of steaming udon noodles on a daily basis. And yet I still don't know how to properly use those darn chopsticks. Go figure.
Here's what you need: brown rice cooked according to package directions in some dashi stock. Easy peasy to make. Really. See here.
Ummm, what else? Some sliced avocado, green onions, a few strips of wild salmon, shredded nori sheets ( the stuff you use to wrap sushi) and red tobiko (flying fish roe) to garnish. And to make it so wonderfully palatable some soy sauce and mirin (Japanese sweet cooking wine).
Cook your rice in the dashi stock. Cool. Season with a few splashes of tamari soy sauce and mirin. Divide into bowls and top with avocado, salmon, pickled ginger and green onions. Be generous with the latter. Unless you're going for oiling the wheels of romance here. Garnish with the shredded nori and tobiko. Enjoy!

Tuesday, April 6, 2010

White quinoa porridge with banana and toasted coconut

IMG_7343


Quinoa is an ancient food that has been cultivated in the South American Andes for centuries. The Inka called it the "mother grain" and considered it sacred. Technically it is not a grain, but a seed, rich in iron, protein and calcium. The protein in quinoa is considered to be a complete protein due to the presence of all 8 essential amino acids.
Before using, the seeds need to be rinsed well in order to remove a bitter resin-like substance called saponin. Usually quinoa sold in North America is already rinsed, but it's always a good idea to rinse again to remove any leftover residue.
Consider using quinoa in soups, stews, salads, breakfast foods, desserts...The possibilities are endless. Being highly nutritious and gluten free, quinoa is a worthy addition to anyone's diet.
I stock up every month on both white and red quiona and try to incorporate it in my cooking at least once a week.
You'll love this one:

White quinoa porridge with banana and toasted coconut

Ingredients:

2 cups light coconut milk
1 cup white quinoa
pinch of salt
1 1/2 cups dark brown sugar
1 banana, sliced
1/4 cup shredded, toasted coconut

Combine coconut milk with 1 cup water in a pan. Add a pinch of salt and quinoa. Bring to a boil over medium heat. Reduce heat and simmer, stirring frequently for about 25 minutes, until the grains are tender.
Meanwhile place sugar with 1 1/4 cups water in another pan and place over medium heat. Stir to dissolve sugar and simmer until thick and syrupy.
Pour some syrup into your serving bowls, then add a layer of quinoa, add more syrup and finally top with sliced banana a sprinkle over the toasted coconut.
Serves 4.
If you haven't got much of a sweet tooth you might enjoy this quinoa salad recipe: http://labohemecherie.blogspot.com/2009/02/moroccan-red-quinoa-salad-with.html

Sunday, April 4, 2010

Wednesday, March 24, 2010

Favourites

Lately I haven't had much time to cook or bake, let alone post anything. So, I just thought I'd share some favourites:

I could listen to this over and over and over again...

width="480" height="385">

Variations on takeout. Two of the cutest kids I have ever met.
Laos 2008.

IMG_7461


Something I've been craving for almost a year now:

IMG_7269


And last, but not least with picnic season coming up I'd really like one of these please!
Hot food on a picnic you ask? Just try it!

Saturday, March 13, 2010

Breakfast for a rainy day

I have a thing for rainy mornings in general and this one in particular. Waking up early just agrees with me somehow. We had a lovely breakfast of baked pears with hazelnut crumble served with greek yogurt and whipped cottage cheese, followed by a healthy dose of Bugs Bunny. Never mind the rain, the sweet smell of cinnamon makes everything better. This is shaping up to be a wonderful day. For you see, this is not a usual Saturday for me. On every other Saturday but this one, you'd find me studying Spanish grammar, running errands, having long conversations with my favourite vendors at the farmer's market, cooking up a storm in the kitchen, and cleaning out my nest. You know, getting ready for a relaxing Sunday. But today is different. I have no intention of studying, cleaning or cooking as I already finished my cooking for the weekend last night. The theme is the Iberian Peninsula, that means braised squid with chorizo and sherry in a roasted garlic and sweet tomato sauce, followed by some Pasteis de Nata, picked up from the bakery.
Right now I'm off for some Dim Sum, this documentary, and later a guitar class.
Have a wonderful weekend my friends!

Spiced honey baked pears with hazelnut crumble

IMG_7258


Ingredients:

For the baked pears:

4 ripe, but firm pears, peeled, cored and cut into wedges
pinch of ground cinnamon
pinch of ground cardamom
1 tsp vanilla extract
1/2 tbsp lemon juice
1/3 cup orange juice
2 tbsp honey

For the crumble:

3o g rolled oats
20 g chopped hazelnuts
15 g brown sugar
1/2 tsp ground cinnamon
40 g butter, melted
Yogurt or cottage cheese to serve

Preheat oven to 325 F.
For the pear mixture, simmer all ingredients in a pan until pears are soft, but not mushy and the liquid has almost evaporated. Pour mixture into a buttered oven proof dish.
For the crumble mix all ingredients by hand making sure to coat all dry ingredients with melted butter. Scatter crumble over pear mixture, bake until golden about 15 minutes.
Serve warm with yogurt.
Recipe adapted from GT magazine.

Wednesday, March 3, 2010

Chocolate salami

There are only a handful of things I'm willing to share. Most of these things have to do with food in some capacity. If it were up to me I'd gleefully share all my meals with loved ones (select ones at that), as I truly believe that entertainment should be a natural and pleasurable part of every one's existence. I like to define a theme, then let it run through the entire occasion. Even if I don't have the right set or props. Say, like nowadays. All my meals are concocted with much love and attention, custom tailored to each recipient's individual preferences. But try as I might, there are always some "glitches" here and there, like this one time, at band camp... I kid, I kid.
Long story short, I love to share my food. And my music. As well as my thoughts on matters of national concern. There's nothing I love more than a substantial, healthy argument.
What I'm not willing to share are my clothes ( just ask my girls:)), my books and the juiciest of bits and pics of my personal life. This is probably why I'm no friend of most types of social media. I do however enjoy my lil'old blog:)
So back to what I do like to share, here's a recipe from the archives: chocolate salami. The last time I had choco salami I was on a train heading to the Black Sea, with a bunch of friends, a backpack and a really old, crappy tent. Back then I thought that trip was somewhat of a disaster, but looking back I have to say it has changed my life to the core. For the better, of course. And I'm still reaping the benefits. See? No juicy stuff here!
Compared to that old version, this recipe has seen some major tweaking and is a summary of a bunch of different versions I found on the world wide web. So, without further ado here it goes:

IMG_7207


Chocolate Salami

Ingredients:

40 g unsalted butter
100 g bittersweet chocolate
35 g icing sugar
1 egg yolk
1 tsp vanilla
40 g condensed milk
100 g butter biscuits (such as Leibniz)
20 g flaked almonds
20 g shredded coconut
40 g dried sour cherries
40 g pistachios
20 g blackberry cordial
25 g dessert wine
cocoa powder

Melt chocolate with butter over a pot of boiling water. Let it cool a little.In another bowl crush biscuits into small pieces, not crumbs. Add almonds, coconut, sour cherries and pistachios. Mix. Add cordial and dessert wine. Mix well and set aside. Take your melted chocolate, add icing sugar, egg yolk, vanilla and condensed milk. Place back over the pot of boiling water and cook for a few minutes, stirring constantly. Add to biscuit mixture. Mix well. Let it cool. Shape into a salami shape using some aluminum foil.
Let it set for a few hours in the fridge. Remove foil and roll salami in cocoa powder. Slice and serve. Perfect picnic fare!

IMG_7242

Monday, February 15, 2010

Braised kohlrabi with poppy seeds.

This one is for all you kohlrabi lovers out there. That's right, all three of you!
Unfortunately kohlrabi is one of those underrated vegetables you can find relatively easily (if you know where to look), yet not a lot of people know what it is. Unless you live in Kashmir, where most households serve kohlrabi for dinner several times a week.
I grew up eating kohlrabi, even love it raw. The crisp, juicy flesh makes a terrific salad, when mixed with julienned carrots, crumbled feta cheese, drizzled with olive oil, lemon juice, sea salt and sprinkled with poppy seeds.
I can't remember a time when buying kohlrabi at the grocery store didn't generate and ad hoc meeting of all cashiers, management and whoever else was willing to put in their two cents' worth. They can never agree on what kohlrabi actually is or how much they're selling it for. Strange, since this veg is so versatile and cheap, not to mention delicious.

IMG_7046

I first made this dish with turnips, found the recipe on the Gourmet magazine website (R.I.P). It's quick and satisfying, and can also be made with carrots and parsnips. Serve with creamy yogurt mixed with some grated lemon rind and drizzled with extra virgin olive oil. The poppy seeds are a must!
Find the recipe here.

Tuesday, February 9, 2010

I've been slacking of. I know. It seems like the dead of winter has gotten the best of me. I try to post something new at least once a week, but lately with all this dreary grey all around me inspiration has avoided me like the plague. I don't seem to have any new ideas. It might be February, or maybe I don't get enough vitamin D. Or maybe I'm just a friggin' cry baby. Those around me would definitely concur with the latter.
So why not make some good old fashioned soul warming beef stew or maybe a gooey chocolate cake? Right?
Mostly because I haven't had time lately for anything elaborate, but also because I'm one of those strange creatures who craves something fresh and crunchy ( and most of the time out of season) in the middle of winter. I'd swap my hot chicken soup with kale and roasted garlic for a bowl of fresh Ontario cherries right about now. Any takers?
So on one of these sunless days last week I decided to put some crunch in my lunch.
Like so:
IMG_6992

Toss some frisee salad with thinly sliced fennel, sliced cara cara oranges and torn fresh mozzarella. Drizzle with a vinaigrette made of extra virgin olive oil, cider vinegar, grainy mustard, fennel seeds, sea salt and a bit of honey. Finish it off with freshly ground black pepper. You could also add some thinly sliced prosciutto to round out the meal. Or maybe a glass of crisp Chardonnay to toast the warm days ahead.

Wednesday, January 27, 2010

Lemon curd

IMG_6212


This one is for one of those mornings when you feel like starting the day on the right note. And by that I mean with dessert. Kinda.
Until a few years ago, in my lil' book of big bad munchies lemon curd fell in the vaguely familiar category. Nowadays it's become a staple in my fridge, right along with Moroccan lemons, Harissa paste and Gianduja spread.
This recipe will yield about 250 grams of luscious curd. Now be warned, this amount has more than 1 stick of butter and can be eaten right out of the jar in one sitting, if you're like me. ( Look for my forthcoming autobiography,entitled How I clogged my arteries in stores everywhere.) But jokes aside, pace yourself, and spread it thinly on toast or use it in a lovely pot de yaourt with some fresh kiwis, pomegranate seeds and passion fruit. And maybe ad some nuts and granola.

Lemon curd

Ingredients:

4 egg yolks
1/3 cup sugar
2 lemons, juice and zest
125 gr butter, chopped

Whisk egg yolks and sugar until pale. Add lemon juice and rind and finally the chopped butter. Place over simmering water(low heat), cook until mixture has thickened (8 to 10 minutes), whisking continuously, bien sur.
Enjoy responsibly!

Tuesday, January 26, 2010

Birthday in the sun

IMG_6792


Due or should I say thanks to the inefficiency of a well-known airline, which shall remain nameless at this point I recently got to spend my birthday with some wonderful friends in California. It was one of those low-key, warm and memorable celebrations that one can only long for. After a decadent lunch of fresh shucked Cherrystone clams and steamed Alaskan king crab, with nothing but warm butter and lemon juice, we set off for a long bike ride along the beach. The weather was sunny, the ocean was calm and my little heart was very happy indeed.
In the evening we were treated to a Vietnamese feast, followed by birthday macaroons, ice cream and lodsa cupcakes.
One of the best birthdays ever!
The last two days were spent driving along the Californian coast with San Francisco as the final destination. I always kinda wondered why San Fran was called the best foodie city in North America. Now I know and cannot wait to go back and further explore it.
If you're in the neighborhood don't miss:

Newport Beach: The Crab Cooker for the most delicious Alaskan king crab.
http://www.crabcooker.com

Los Angeles: Caffe Bello for the best coffee and hot chocolate this side of the pond.
http://Www.CAFFE-BELLO.COM/

San Francisco: Loving Cup, espresso and rice pud bar. Come on!!!
http://www.lovingcupsf.com/

Delfina Pizzeria, for the best pizza you'll ever have.
http://www.pizzeriadelfina.com/

IMG_6566

IMG_6250

IMG_6562

Picture 1

Picture 2

IMG_6393

IMG_6865

IMG_6871

Tuesday, January 5, 2010

Liptauer cheese spread

IMG_6199


Liptauer is traditional Austro-Hungarian cheese spread, but Romanians, Czecks and Scandinavians also claim it as their own. It's typicaly served as a snack on rye bread, or sometimes as a filling for different types of appetizers. I like it thickly spread on rye bread with some cornichons and thinly sliced red onions. Oh, and it's great with beer!
My version is made with a combination of cream cheese and cottage cheese. Use the best cottage cheese you can get your hands on. It should be rich and creamy, nothing like some of the clumpy, loaded with additives commercial brands out there. Try your local Farmer's market. Some recipes use capers and anchovy paste and a lot of paprika. I kept it fairly simple. You adjust it to your taste. That way we can all avoid heated arguments or virtual hair pulling, trying to figure out what the stuff should be like or where it comes from. The important thing is where's it's going: your hungry belly!

Ingredients:

250 g cream cheese
250 g good quality pressed cottage cheese
2 small cornichons, finely diced
1 large clove of garlic, minced
1 tbsp fresh chives, chopped
1 tsp caraway seeds (a must)
1/2 tsp Hungarian paprika
1 tsp grainy mustard
pinch of salt

Mix all ingredients in a bowl. Serve at room temperature with rye bread or crackers, cornichons and thinly sliced red onions.
Or for a fresh summer lunch try stuffing some sweet cherry tomatoes with the cheese spread and toss them with fresh heirloom salad leaves, radishes, chopped boiled eggs and some herb vinaigrette.

Friday, January 1, 2010

Happy New Year!

IMG_6093


We started off this brand New Year on a very good note, I'd say. With a scrumptious breakfast. Eating some sort of fried dough (which I have a thing for) for breakfast on every January the 1st has inadvertently become a tradition around here. And there's nothing wrong with that, as my New Year's resolution is very skimpy on any details regarding any kind of self restraint when it comes to guilty pleasures.
Find the recipe for these delicious Buttermilk Beignets here.
May your New Year be the best ever, filled with love, peace, hopes and dreams!